Hello!
Use this section to help navigate through the Reel Builder and get tips
for making an awesome Reel!
The basic steps include: uploading your 7 jpg images, adding text
(optional),choosing an image for the center of your Reel, and approving the
final version.
Once approved you can order your Reel!
To start, name your Reel so you can easily identify it in your account.
*TIP- The name of your Reel does not show up anywhere on the Reel itself.

Upload Your Images
First, choose which frame you wish to edit by clicking the thumbnail below.
*There are only 7 images per reel! Click here to learn why!

To upload a new photo, click "Add Image" and choose either a photo from your
device or a stock photo. Photos will need to be jpg files.
Once your photo is uploaded the fun begins!
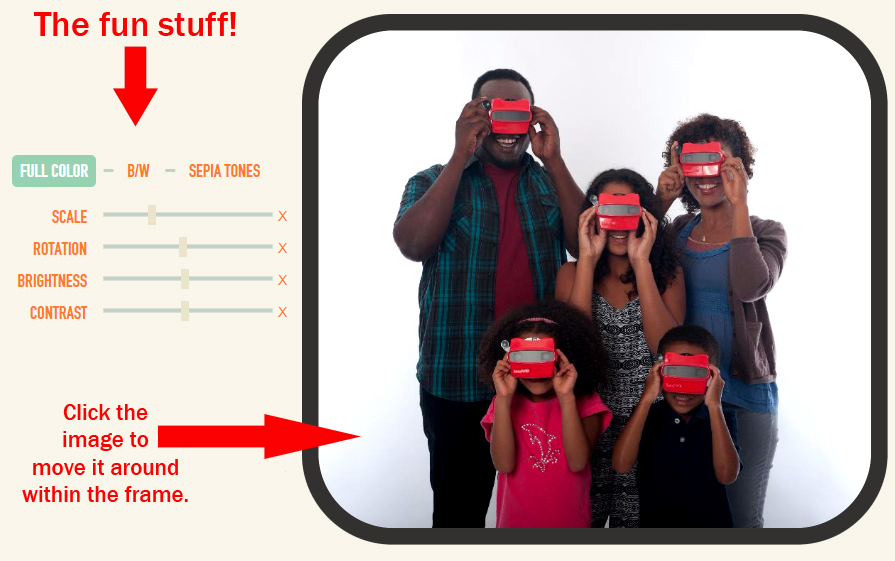
- -Choose your image to be in full color, black and white, or sepia for a fun look.
- -You can scale in or out, which makes the image larger or smaller.
- -If someone or something is cut off, simply click the image & drag it around the frame.
- -You can rotate the image to a fun angle.
- -You can change the brightness or contrast to make photos really pop!
*Clicking the "X" next to each section will revert your changes back to the original view.
*TIP- If your photo is very small, it will look pixelated on the screen. If it looks pixelated on the screen, it will print that way. So, be sure to scale the image out or choose a new image.

Text
Fun Fact! Any text you add using our tool will be in 3D!
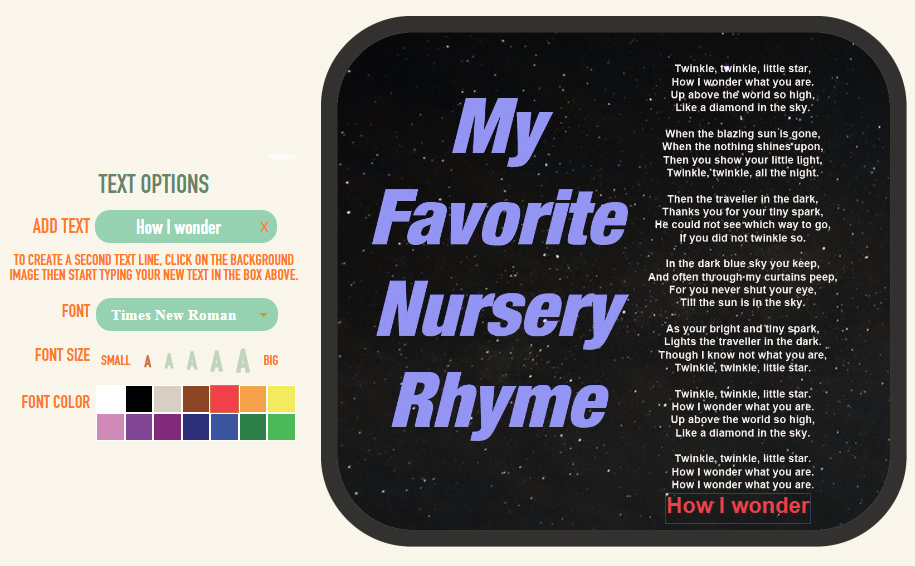
To add text, click in the supplied "Add Text" box and type. You can then change the font, size, and color.
To move the text, click and drag it around the frame.
To create a second line of text, click the background image and start typing your new line of text in the supplied "Add Text" box.

*TIP- If you are uploading images with text already on them, ensure the size is large enough to be legible. A good test is to type some of the words in your file using our text tool and choose the smallest size font to compare (see the example image below...the original file has the white text. The red text is comparing the smallest offered size). If your text is smaller you should edit your original file to make the text larger because small text will be very hard to read within the viewer.

Center Image
To add a fun center image to your Reel, click "Step 2 - Center Image"
Add a photo from your device or choose a stock photo. *Photos will need to be jpg
files.
When you are done editing, be sure to click "Done Editing Center Image" to save
your changes.
TIP- *You cannot see the center image when looking through the viewer at your Reel. The center image is only visible if the Reel is taken out of the viewer. If you have important info to put on the Reel, put it on one of the frames instead of the center image.

Approve Your Reel
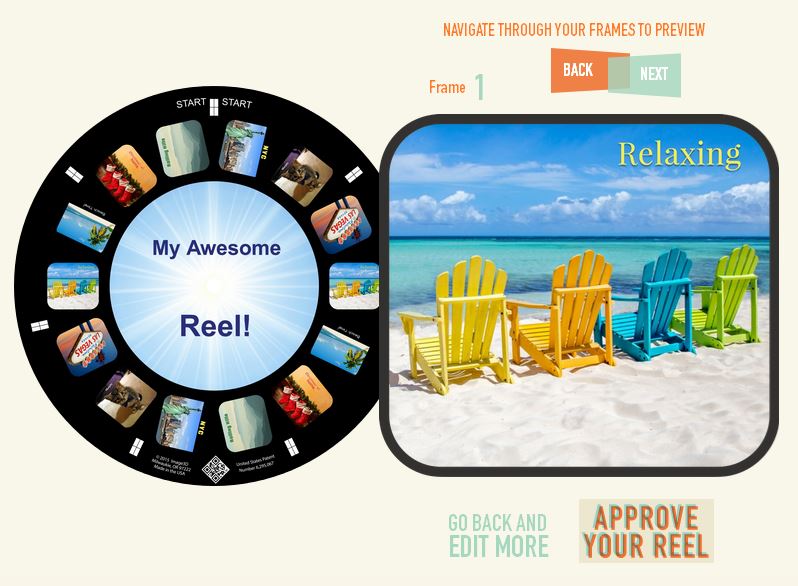
Once you have designed all 7 frames in Step 1 and designed the center of the reel in Step 2, you can preview the final reel.
Click "Preview Your Reel"

Next, navigate through your frames to ensure they look just right.
If all is good, click "Approve Your Reel", if you need to change something, click
"Go Back and Edit More"
TIP: If you see a blank spot on the reel, such as your center image is missing or one of the frames, something went wrong when saving. Simply go back, re-save, and click preview again.

*Curious why you only upload 7 images when you can see more spaces on the reel?
Click here
to learn why!


 Next, navigate through your frames to ensure they look just right.
If all is good, click "Approve Your Reel", if you need to change something, click
"Go Back and Edit More"
 *Curious why you only upload 7 images when you can see more spaces on the reel?


 Click here to continue

